Welcome to Requestly! This guide will help you get started in just a few minutes. By the end, you’ll know how to send requests, organize them into collections, and use variables to manage different environments.
Prerequisites
You’ll need either:- Browser Extension (Chrome, Firefox, Edge, Brave) - Best for web API testing
- Desktop App (Download) - Best for mobile apps, local APIs, and advanced use cases
Step 1: Send Your First API Request
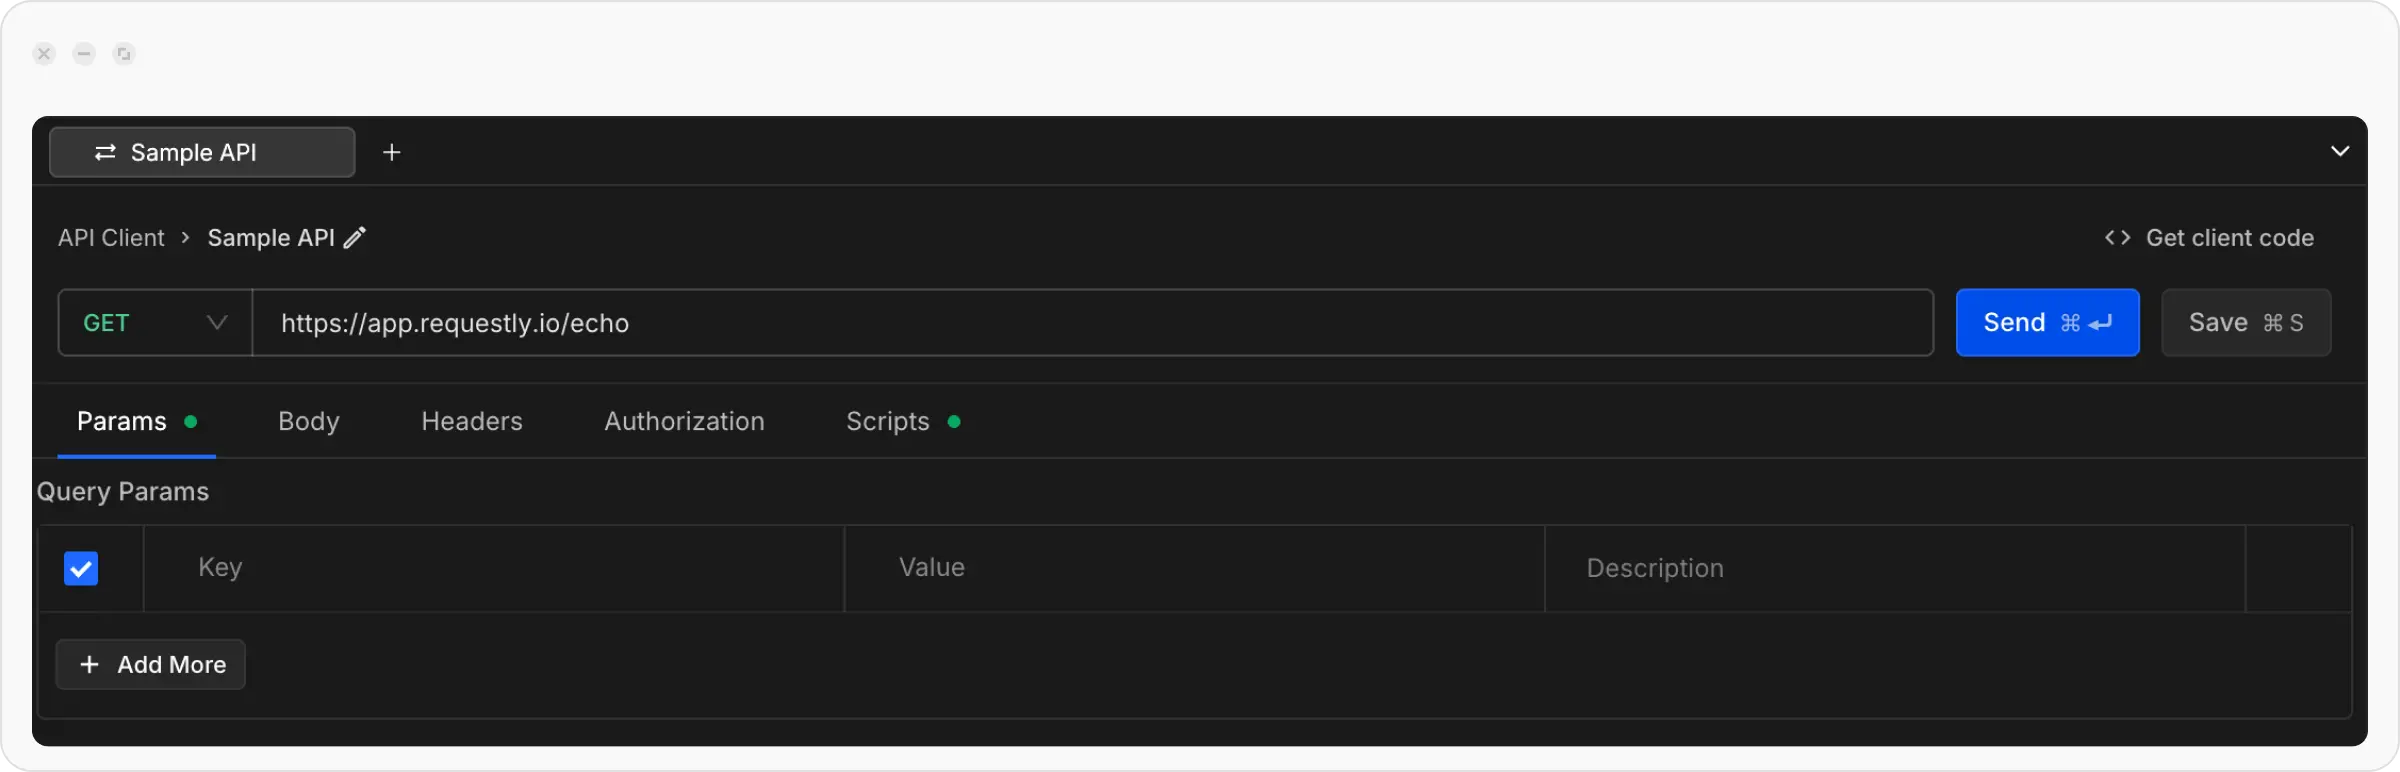
Let’s start by sending a simple GET request to test the API Client.Open API Client and Create a New Request
Click the API Client link in the left sidebar of the Requestly application, then click the 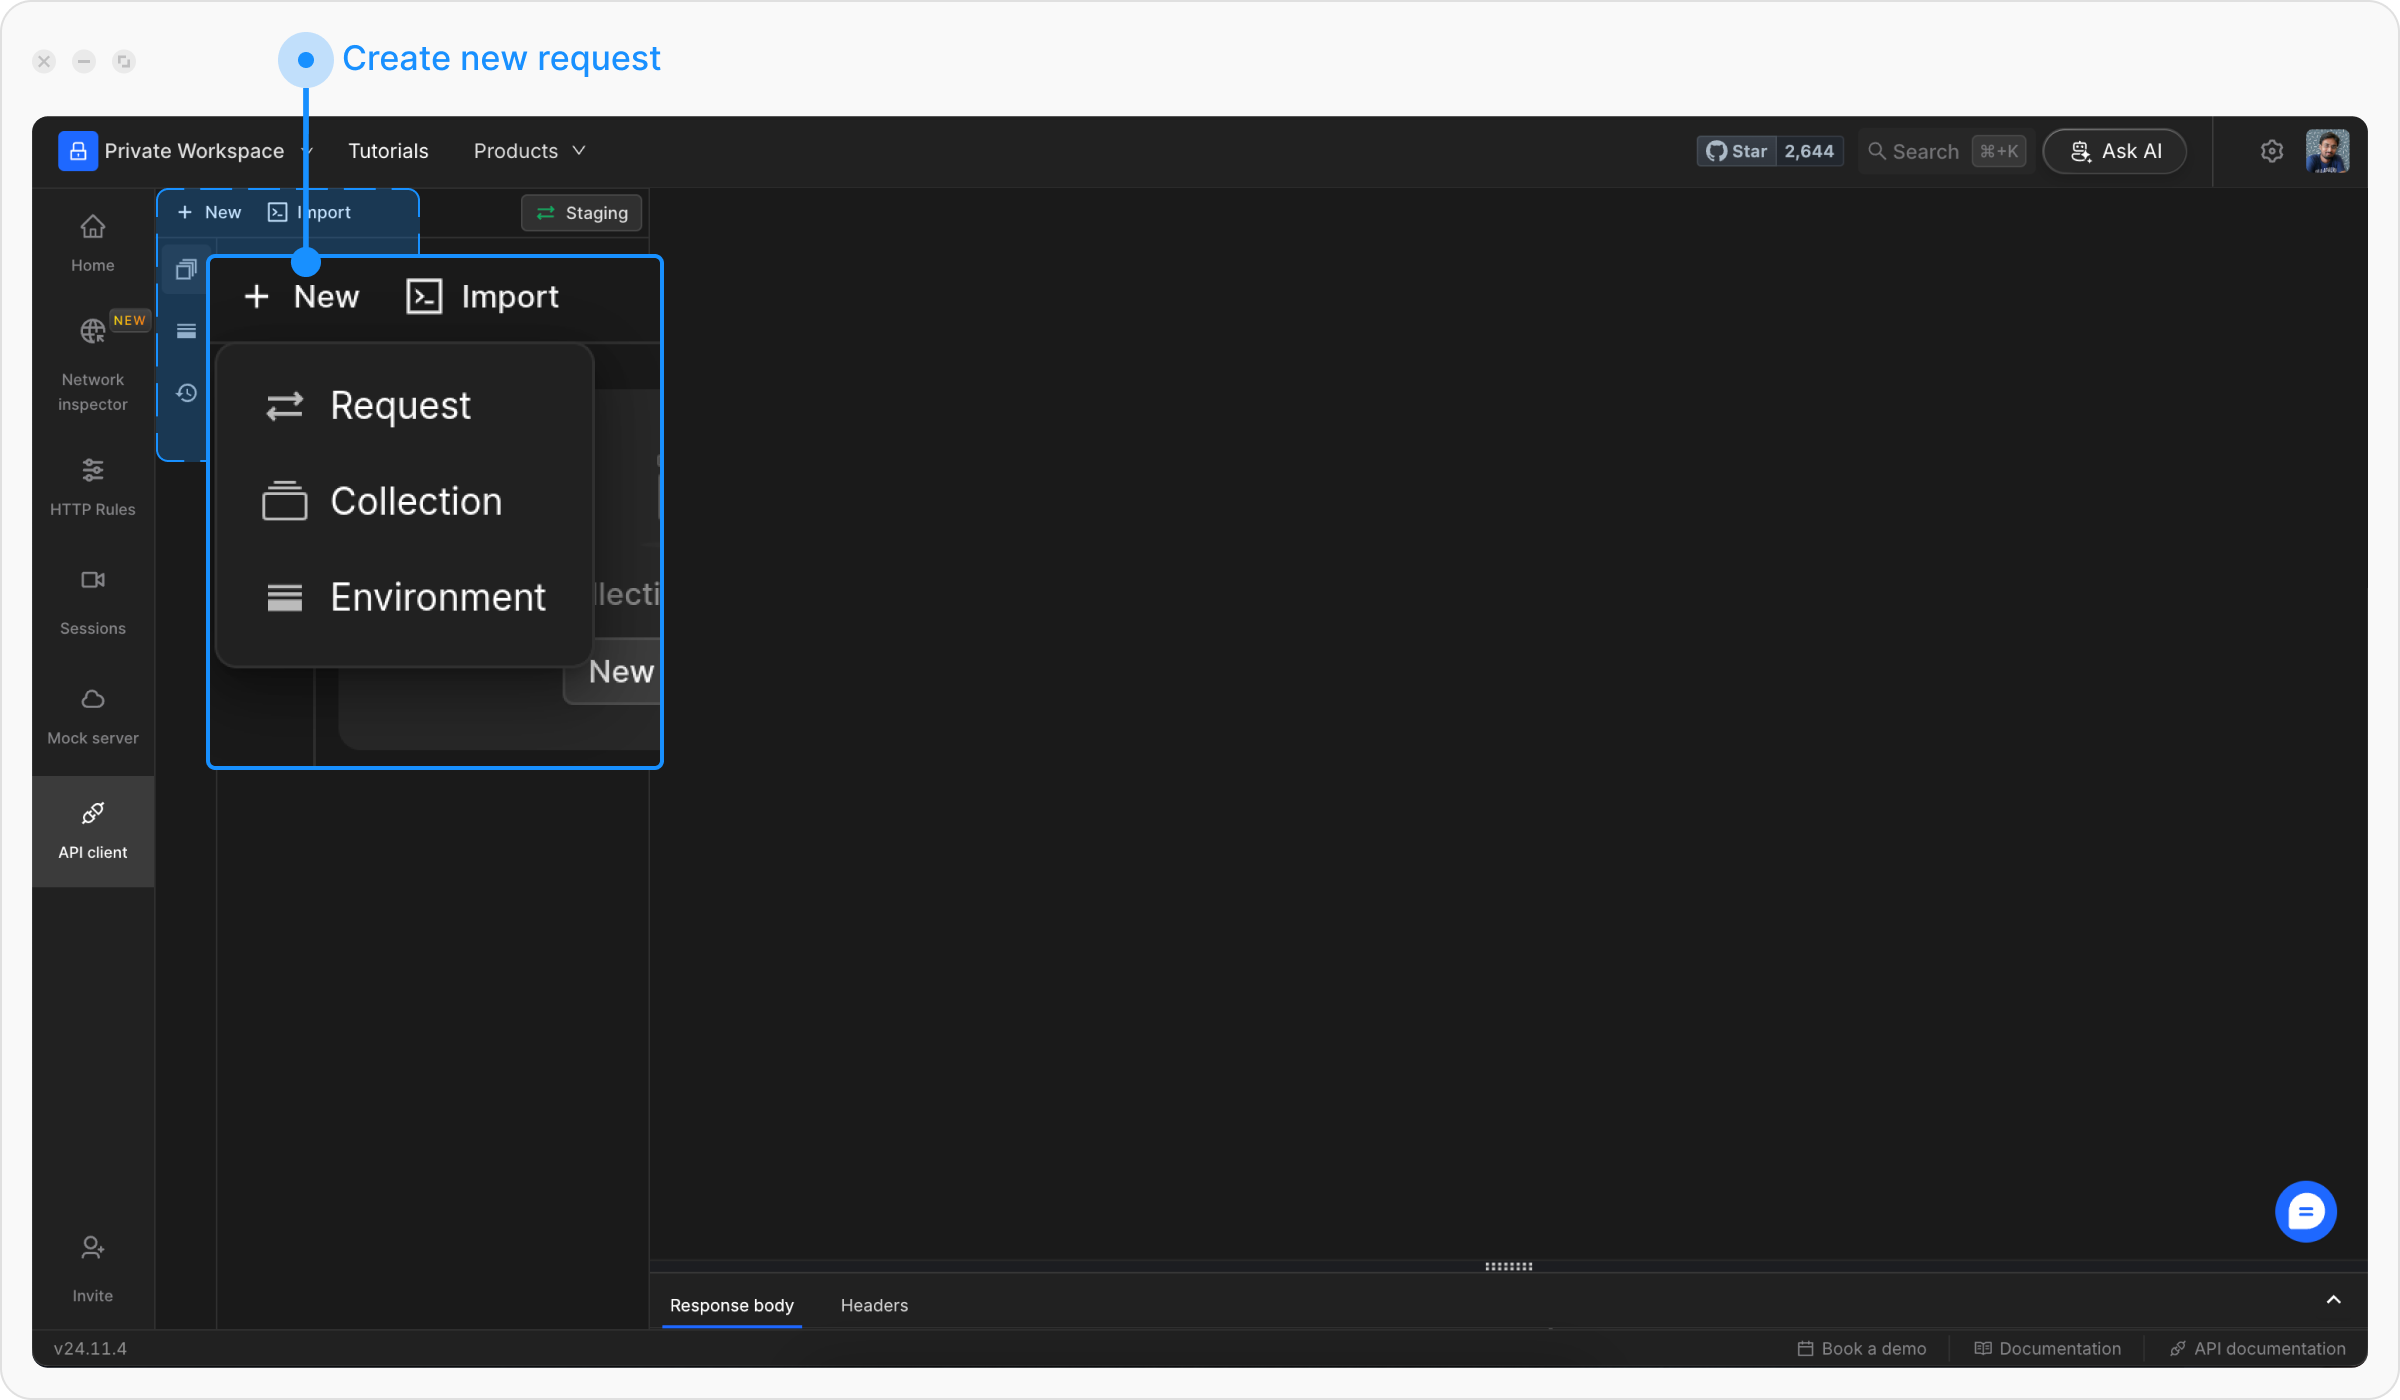
+ New button to create a new request and select Request from the menu.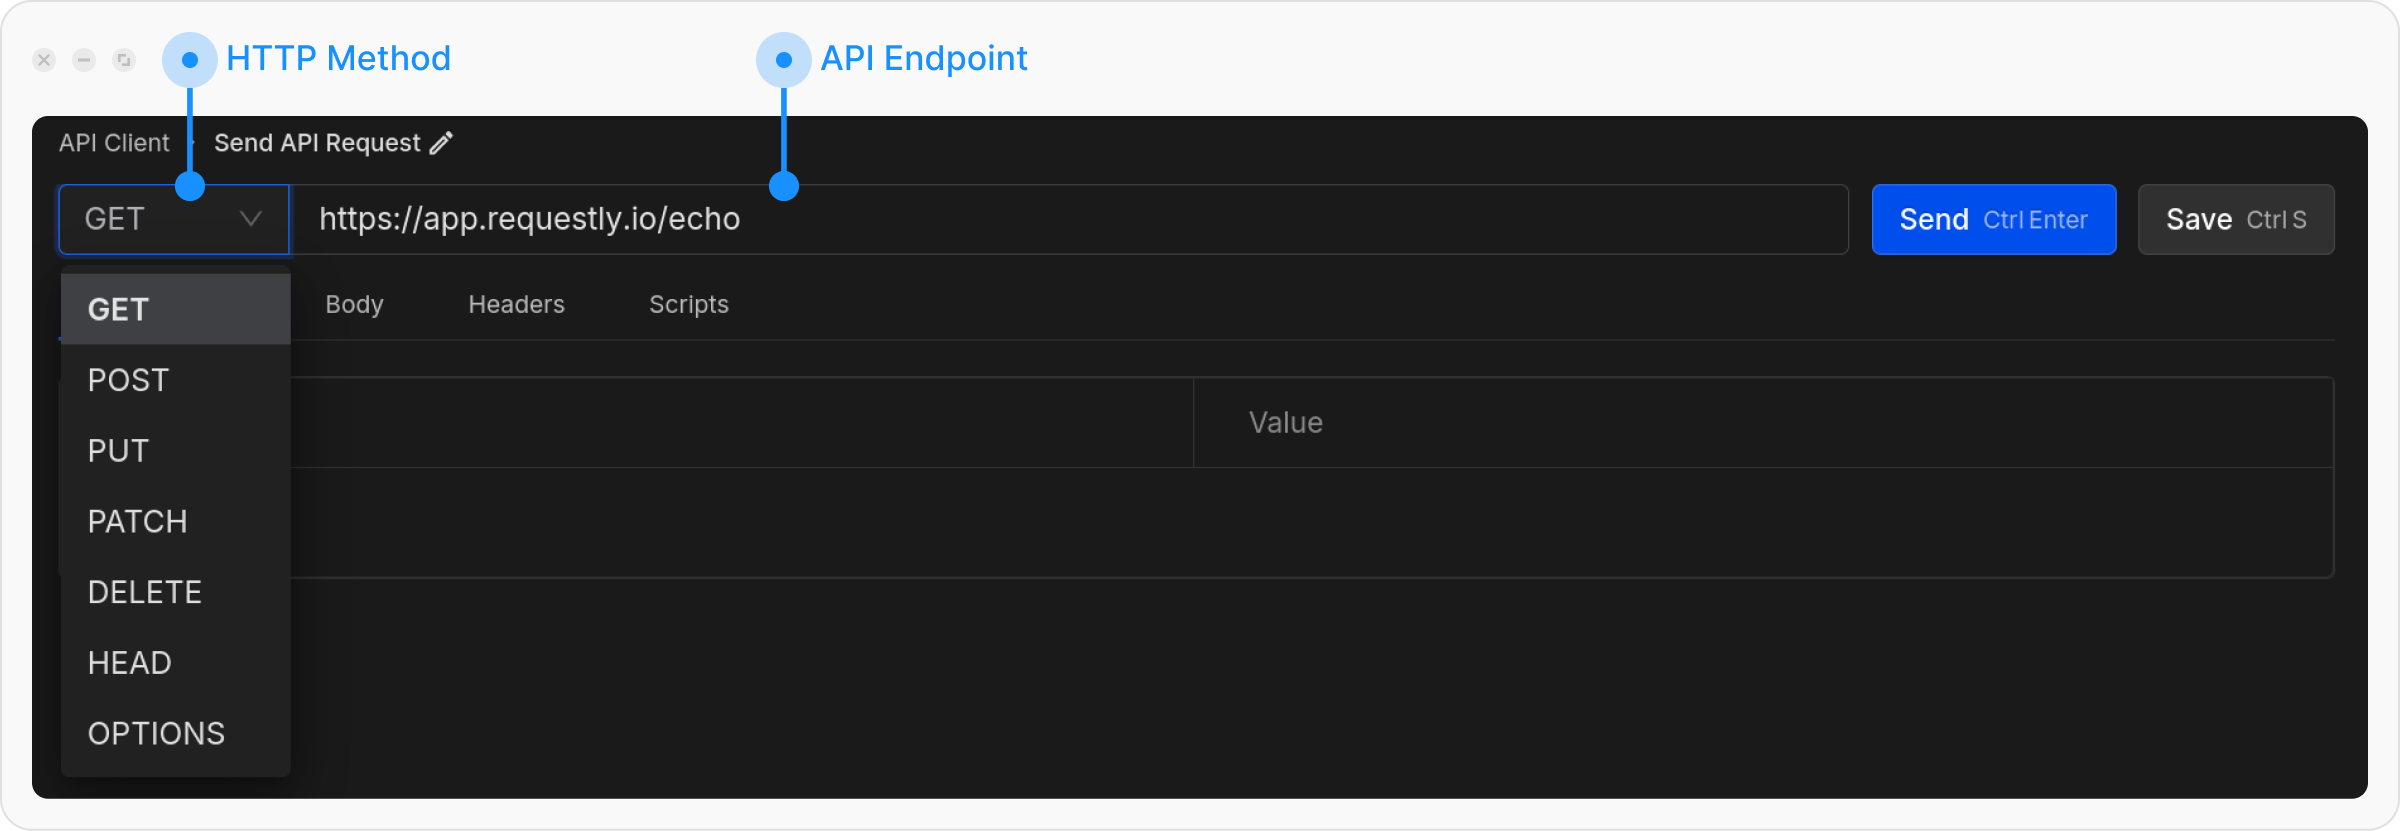
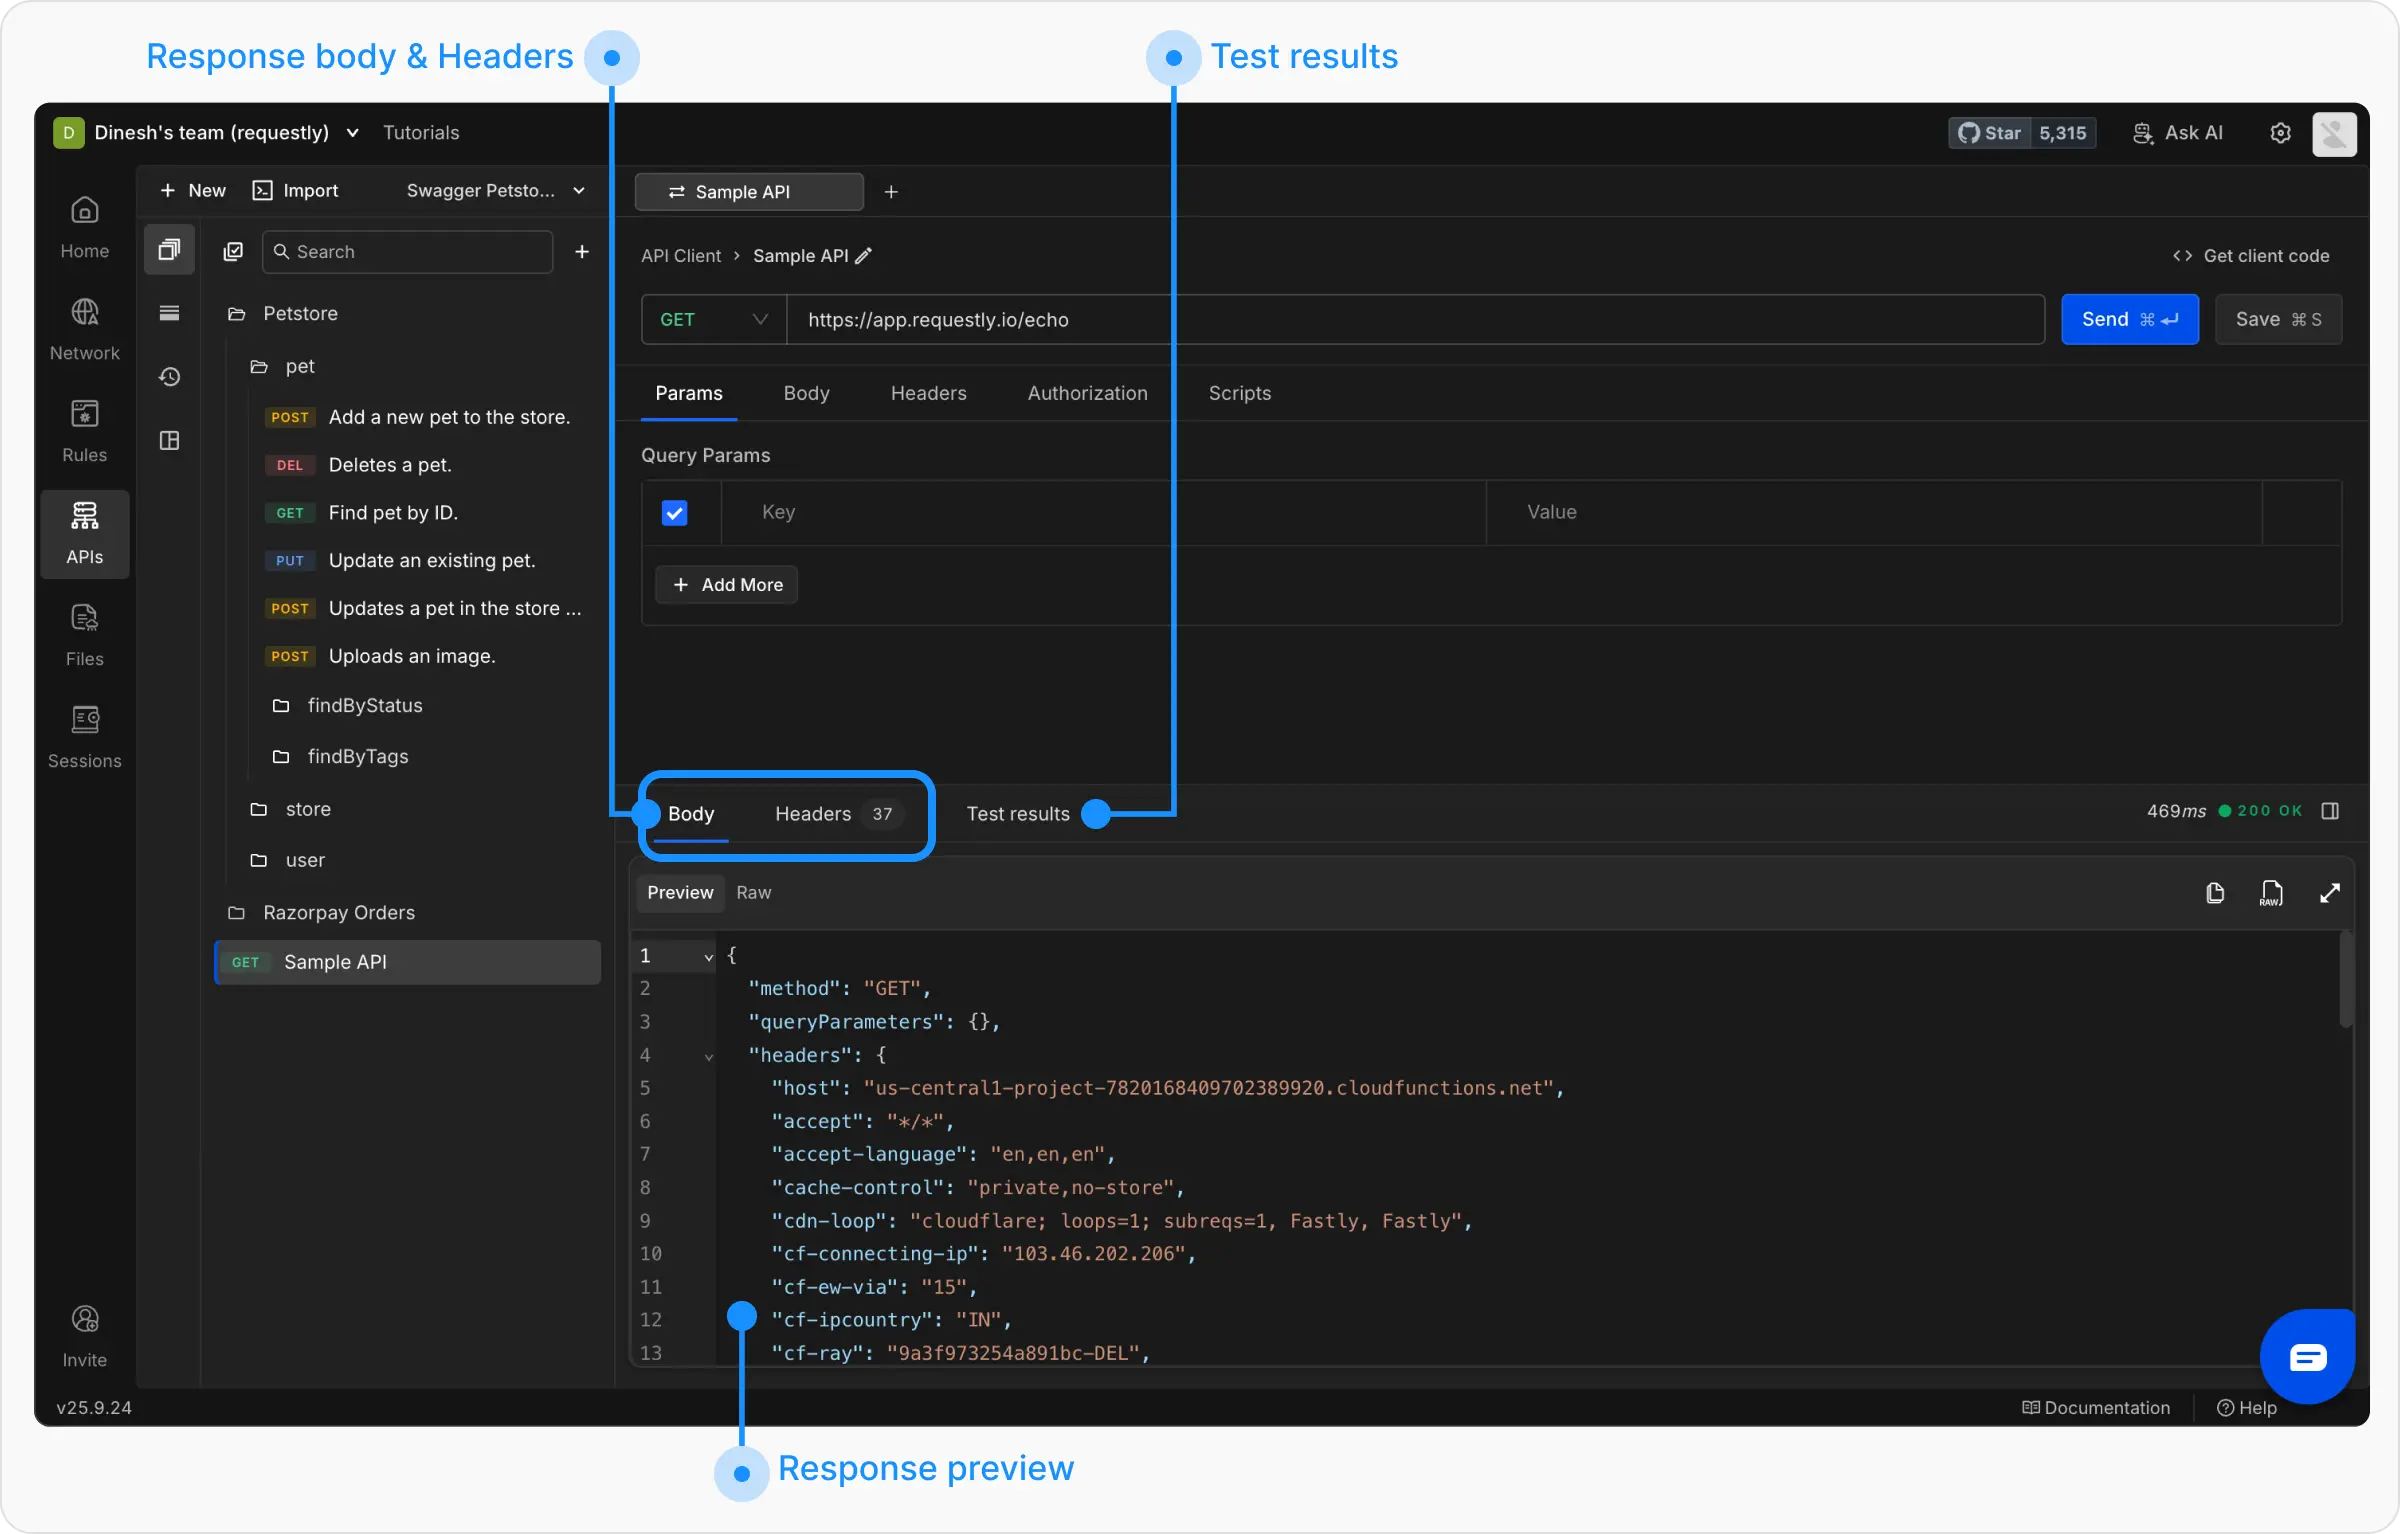
Step 2: Understand the Interface
The API Client interface is divided into key sections:- Request Panel
- Response Panel
- Collections: View all your API collections and requests
- Environments: Manage environment variables
- History: Access previously sent requests
- Runtime Variables: Manage runtime variables that can be used across workspaces
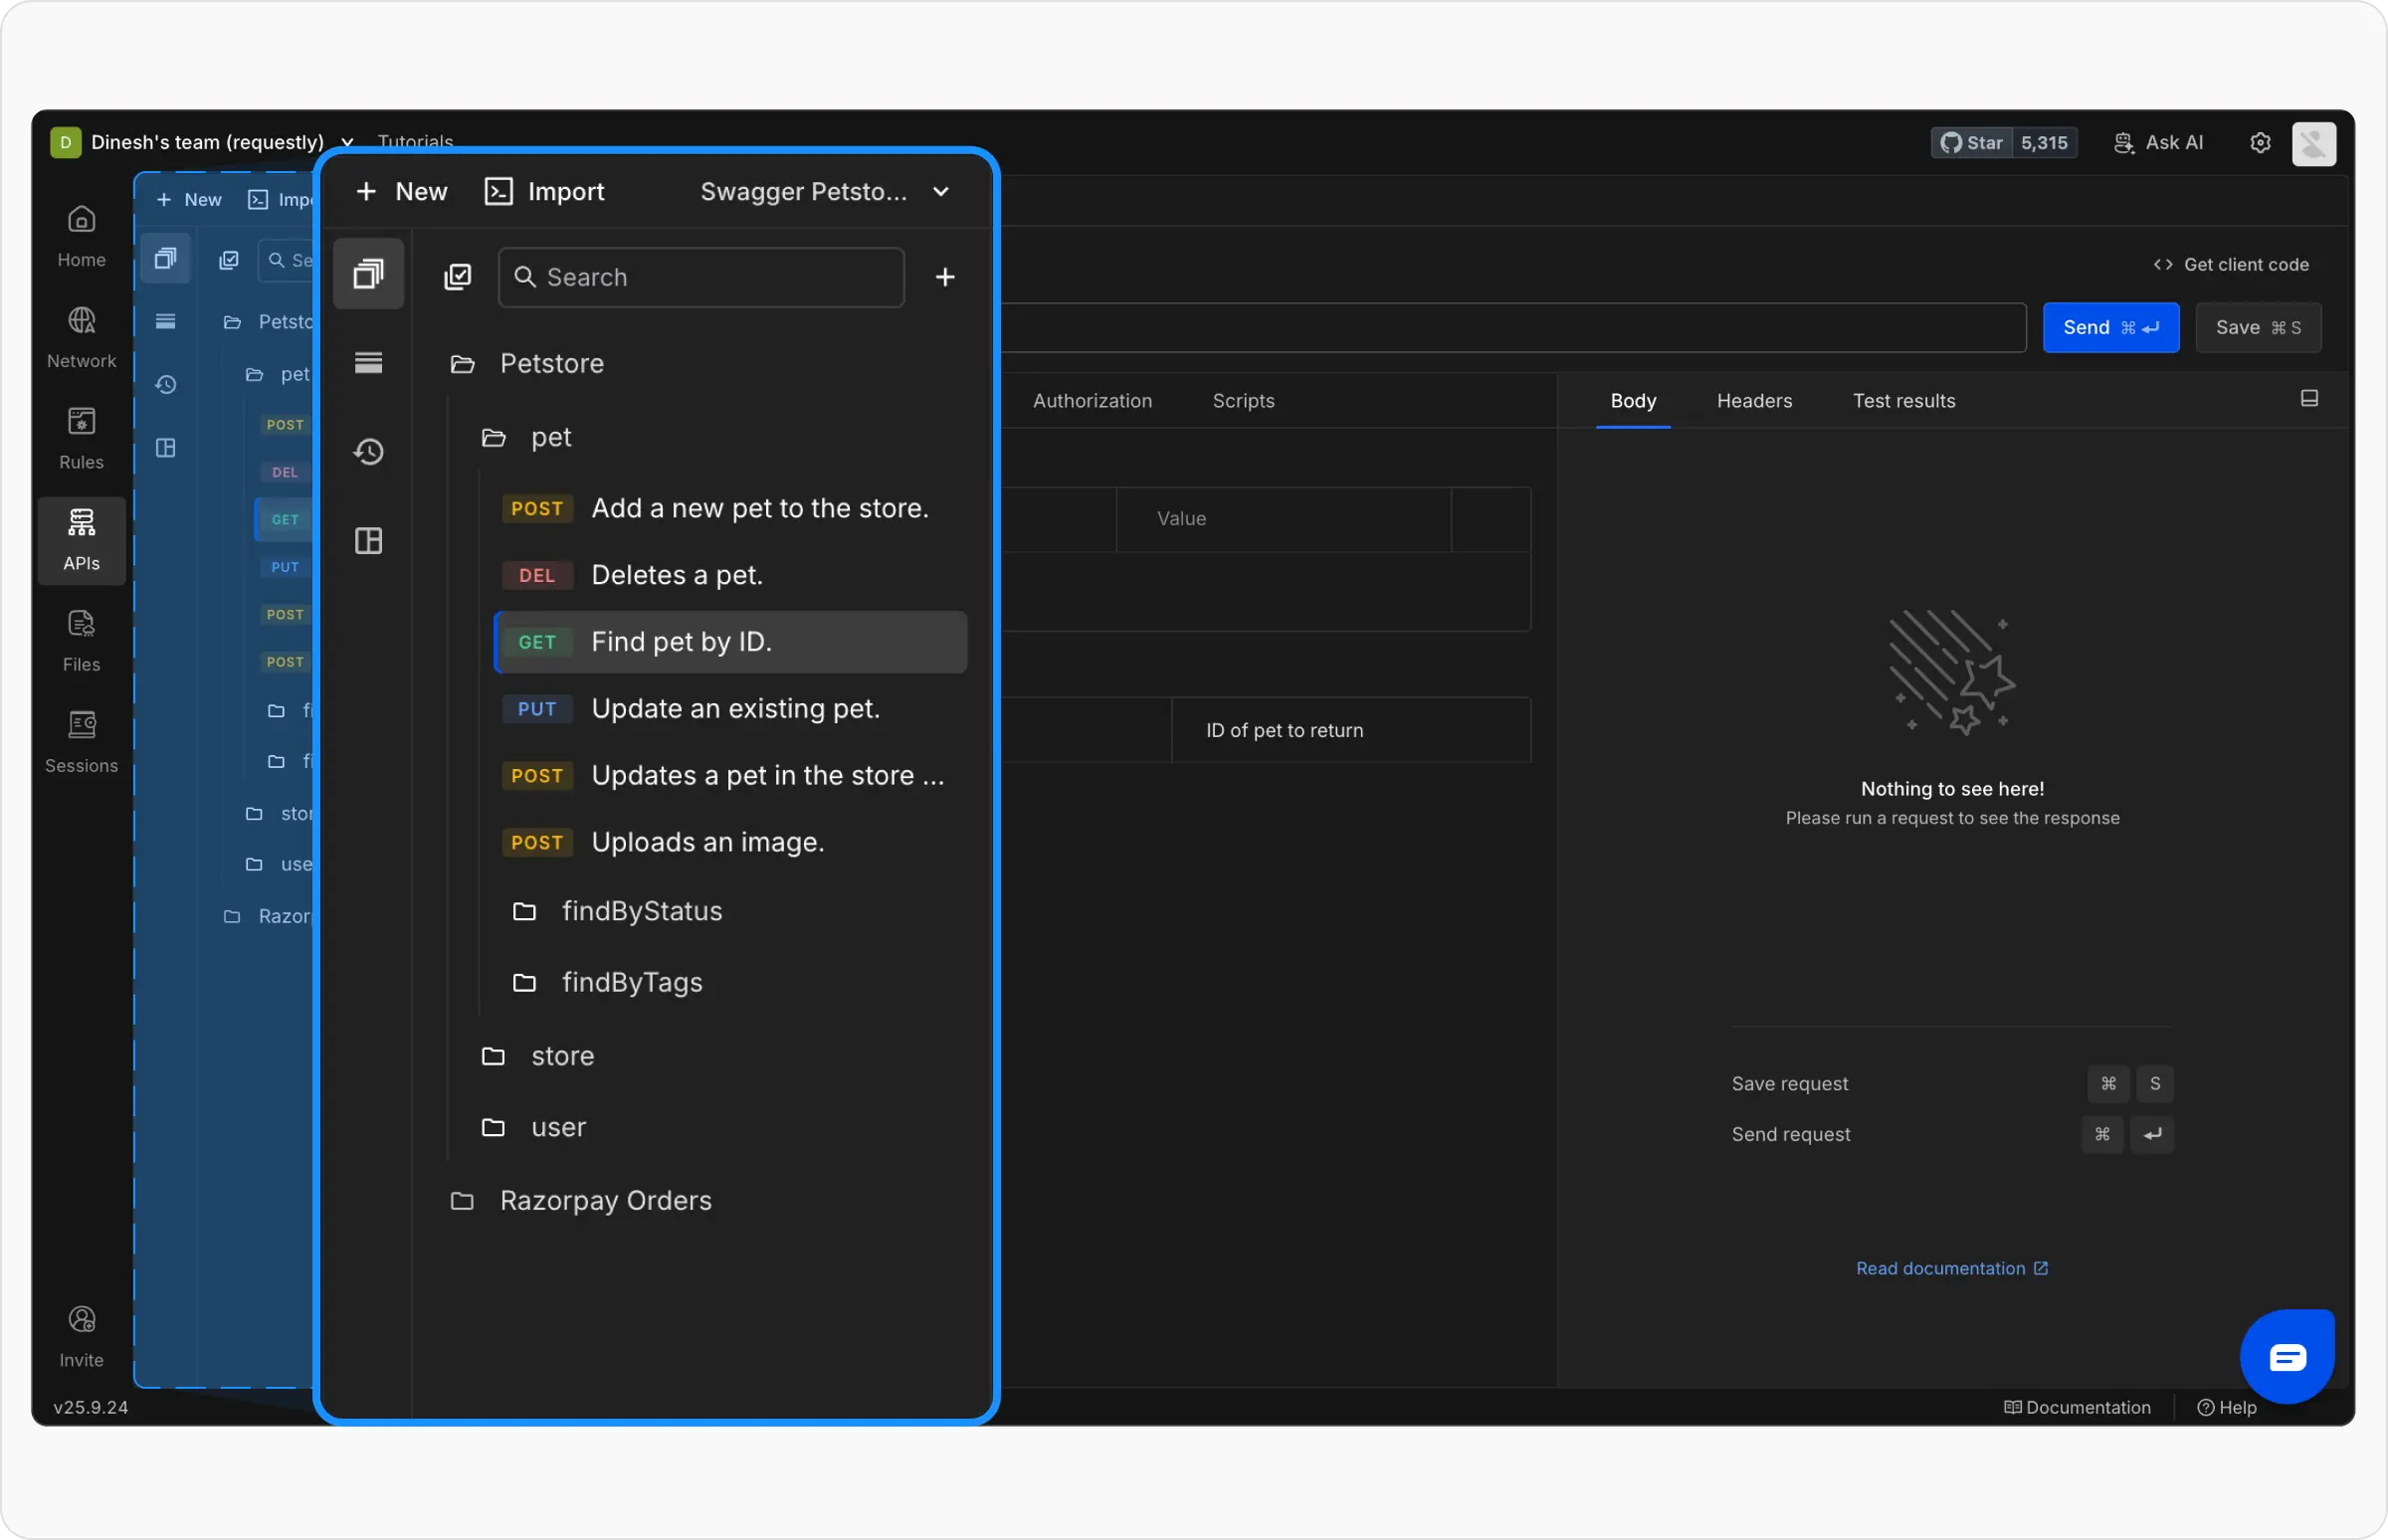
Step 3: Create Your First Collection
Collections help you organize related API requests. Let’s create one for a sample project.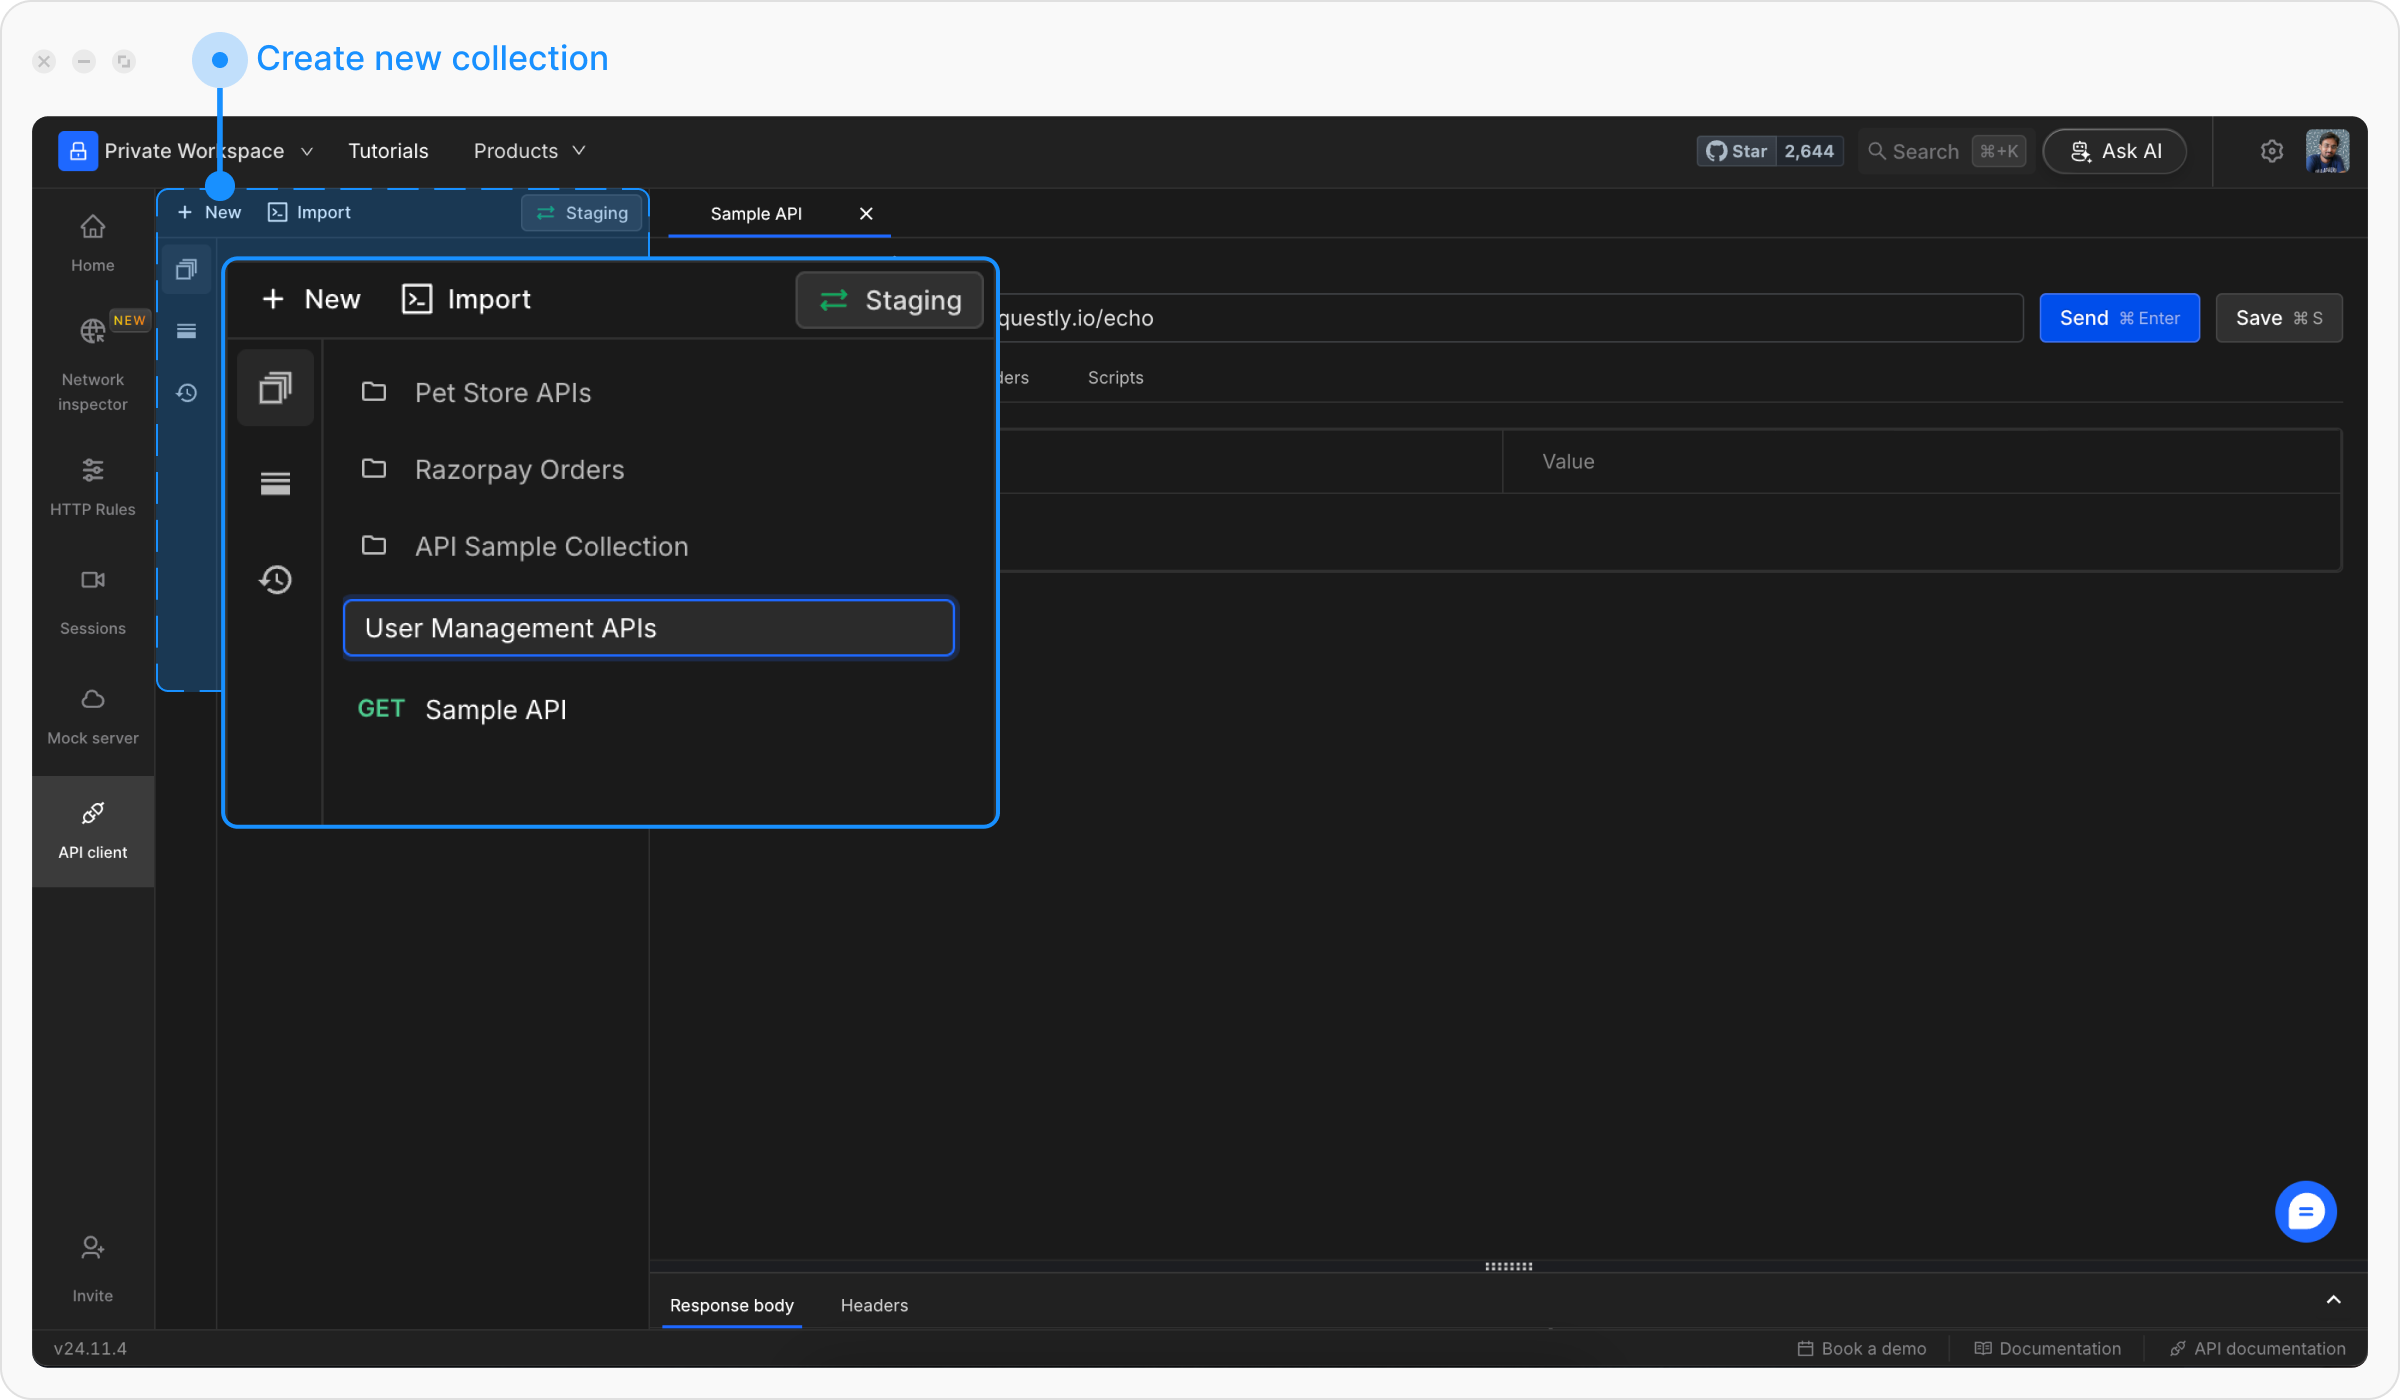
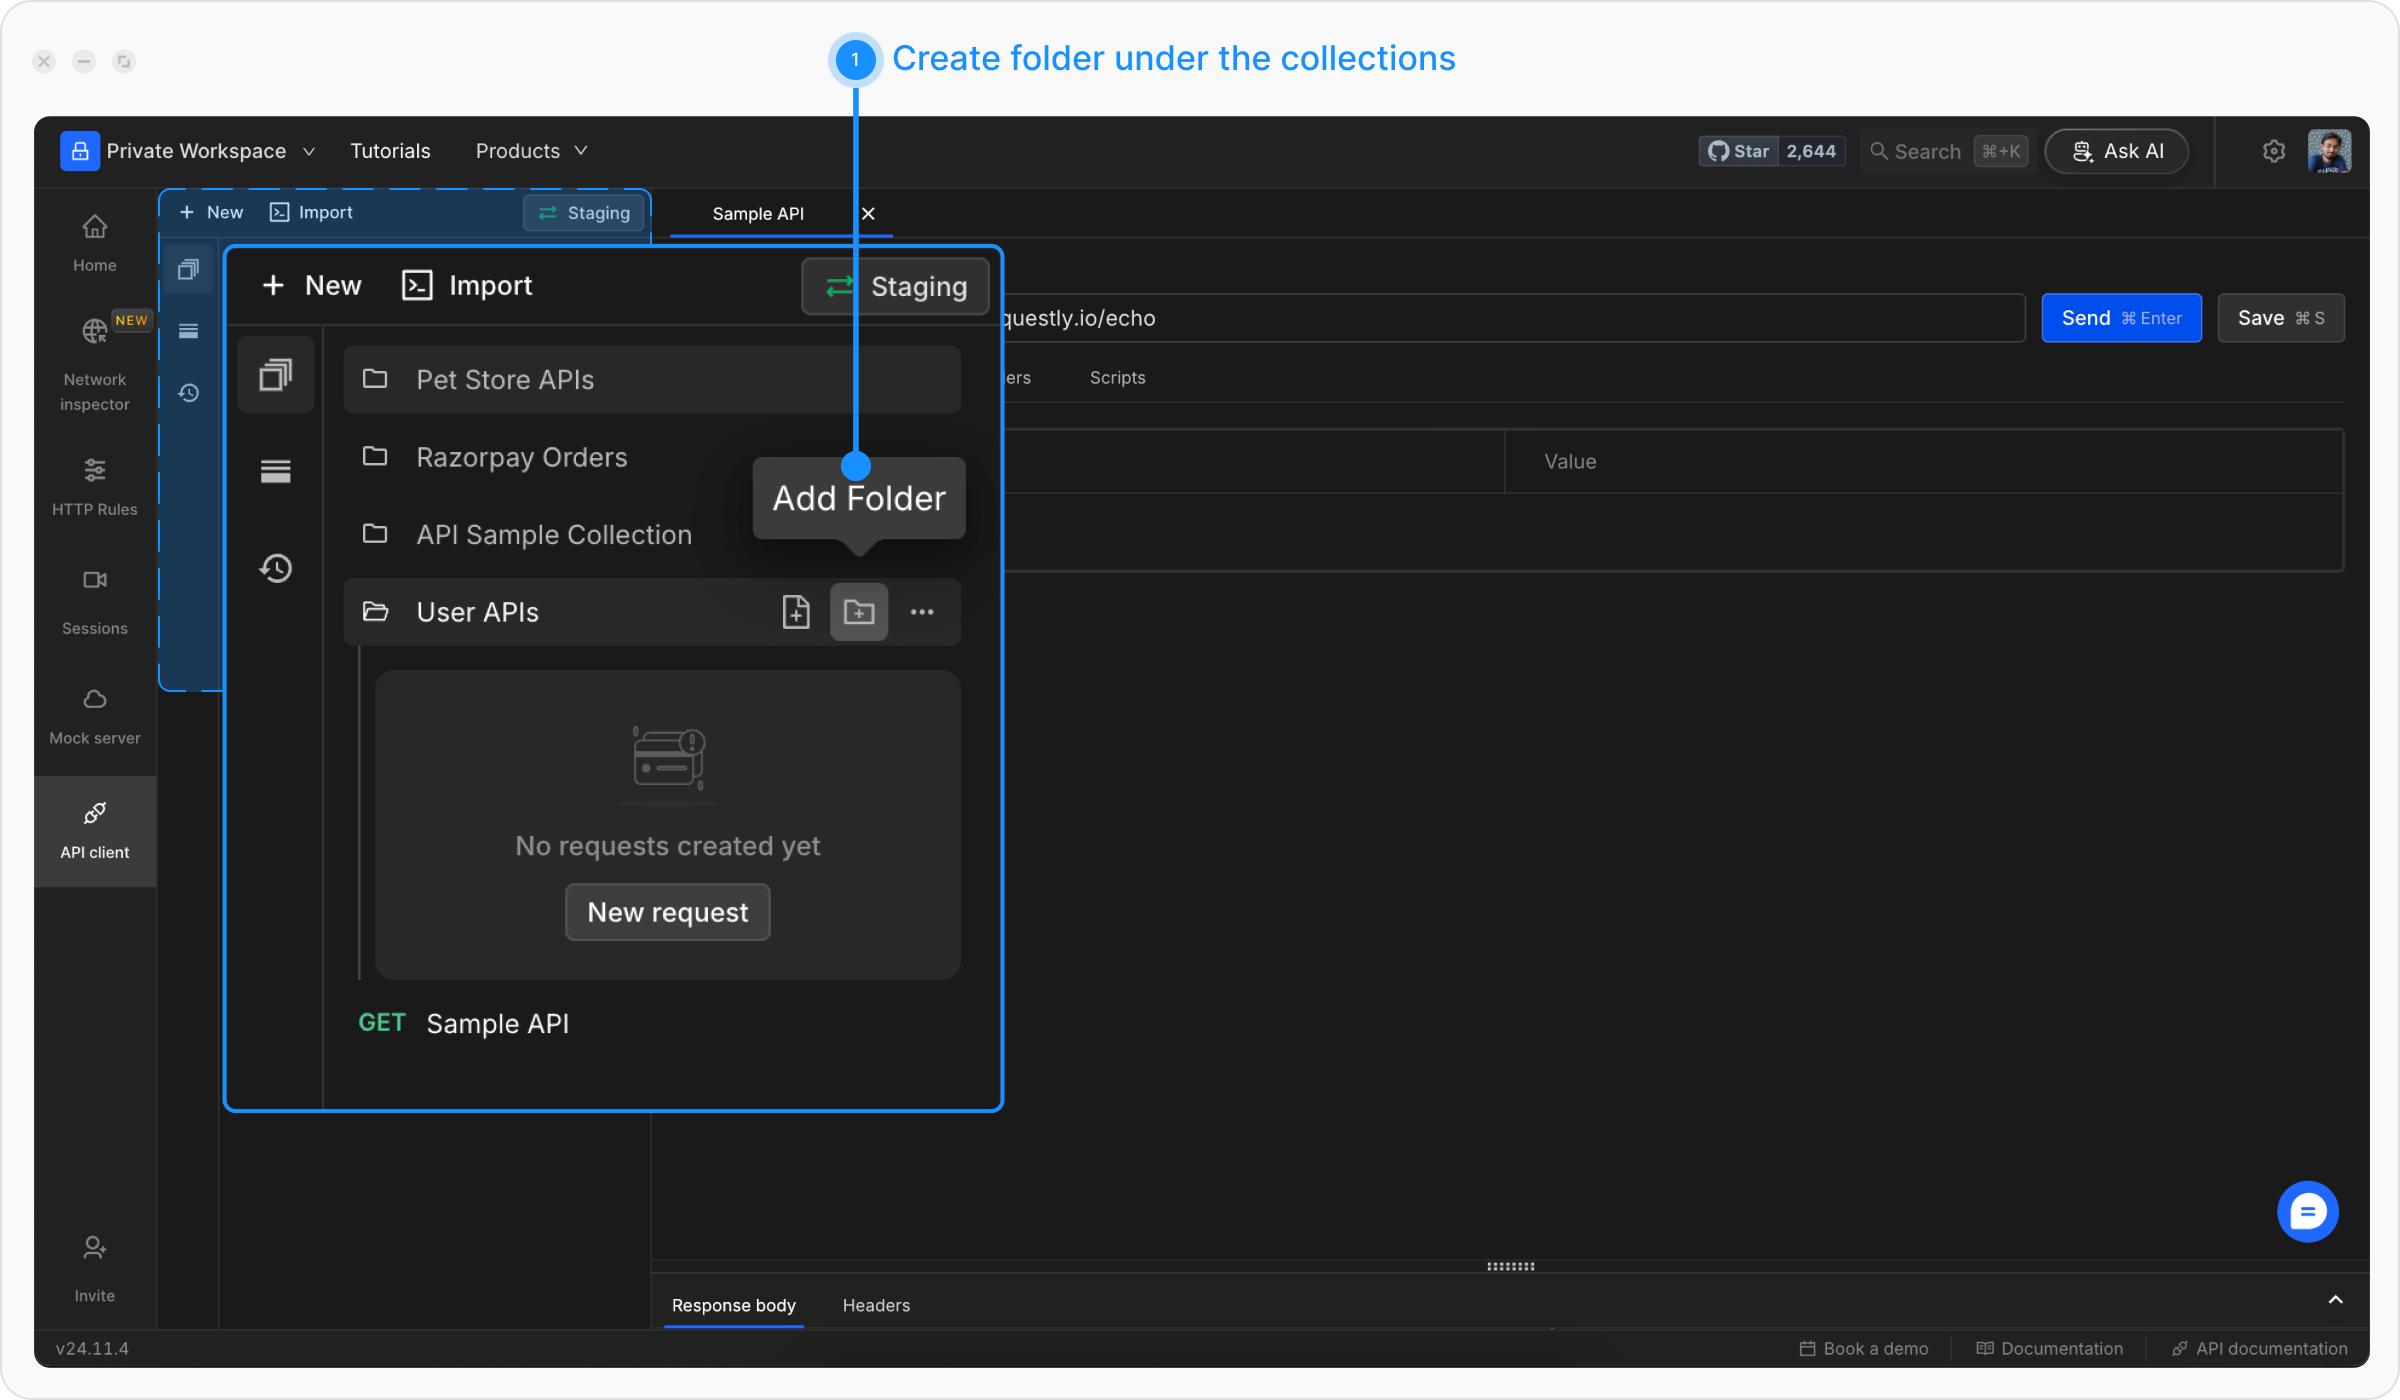
Add Requests to Collection
Drag your previously created request into the collection, or create a new request directly inside the collection by clicking the + icon next to the collection name.
Step 4: Set Up Environment Variables
Variables allow you to switch between different API environments (dev, staging, production) without changing your requests.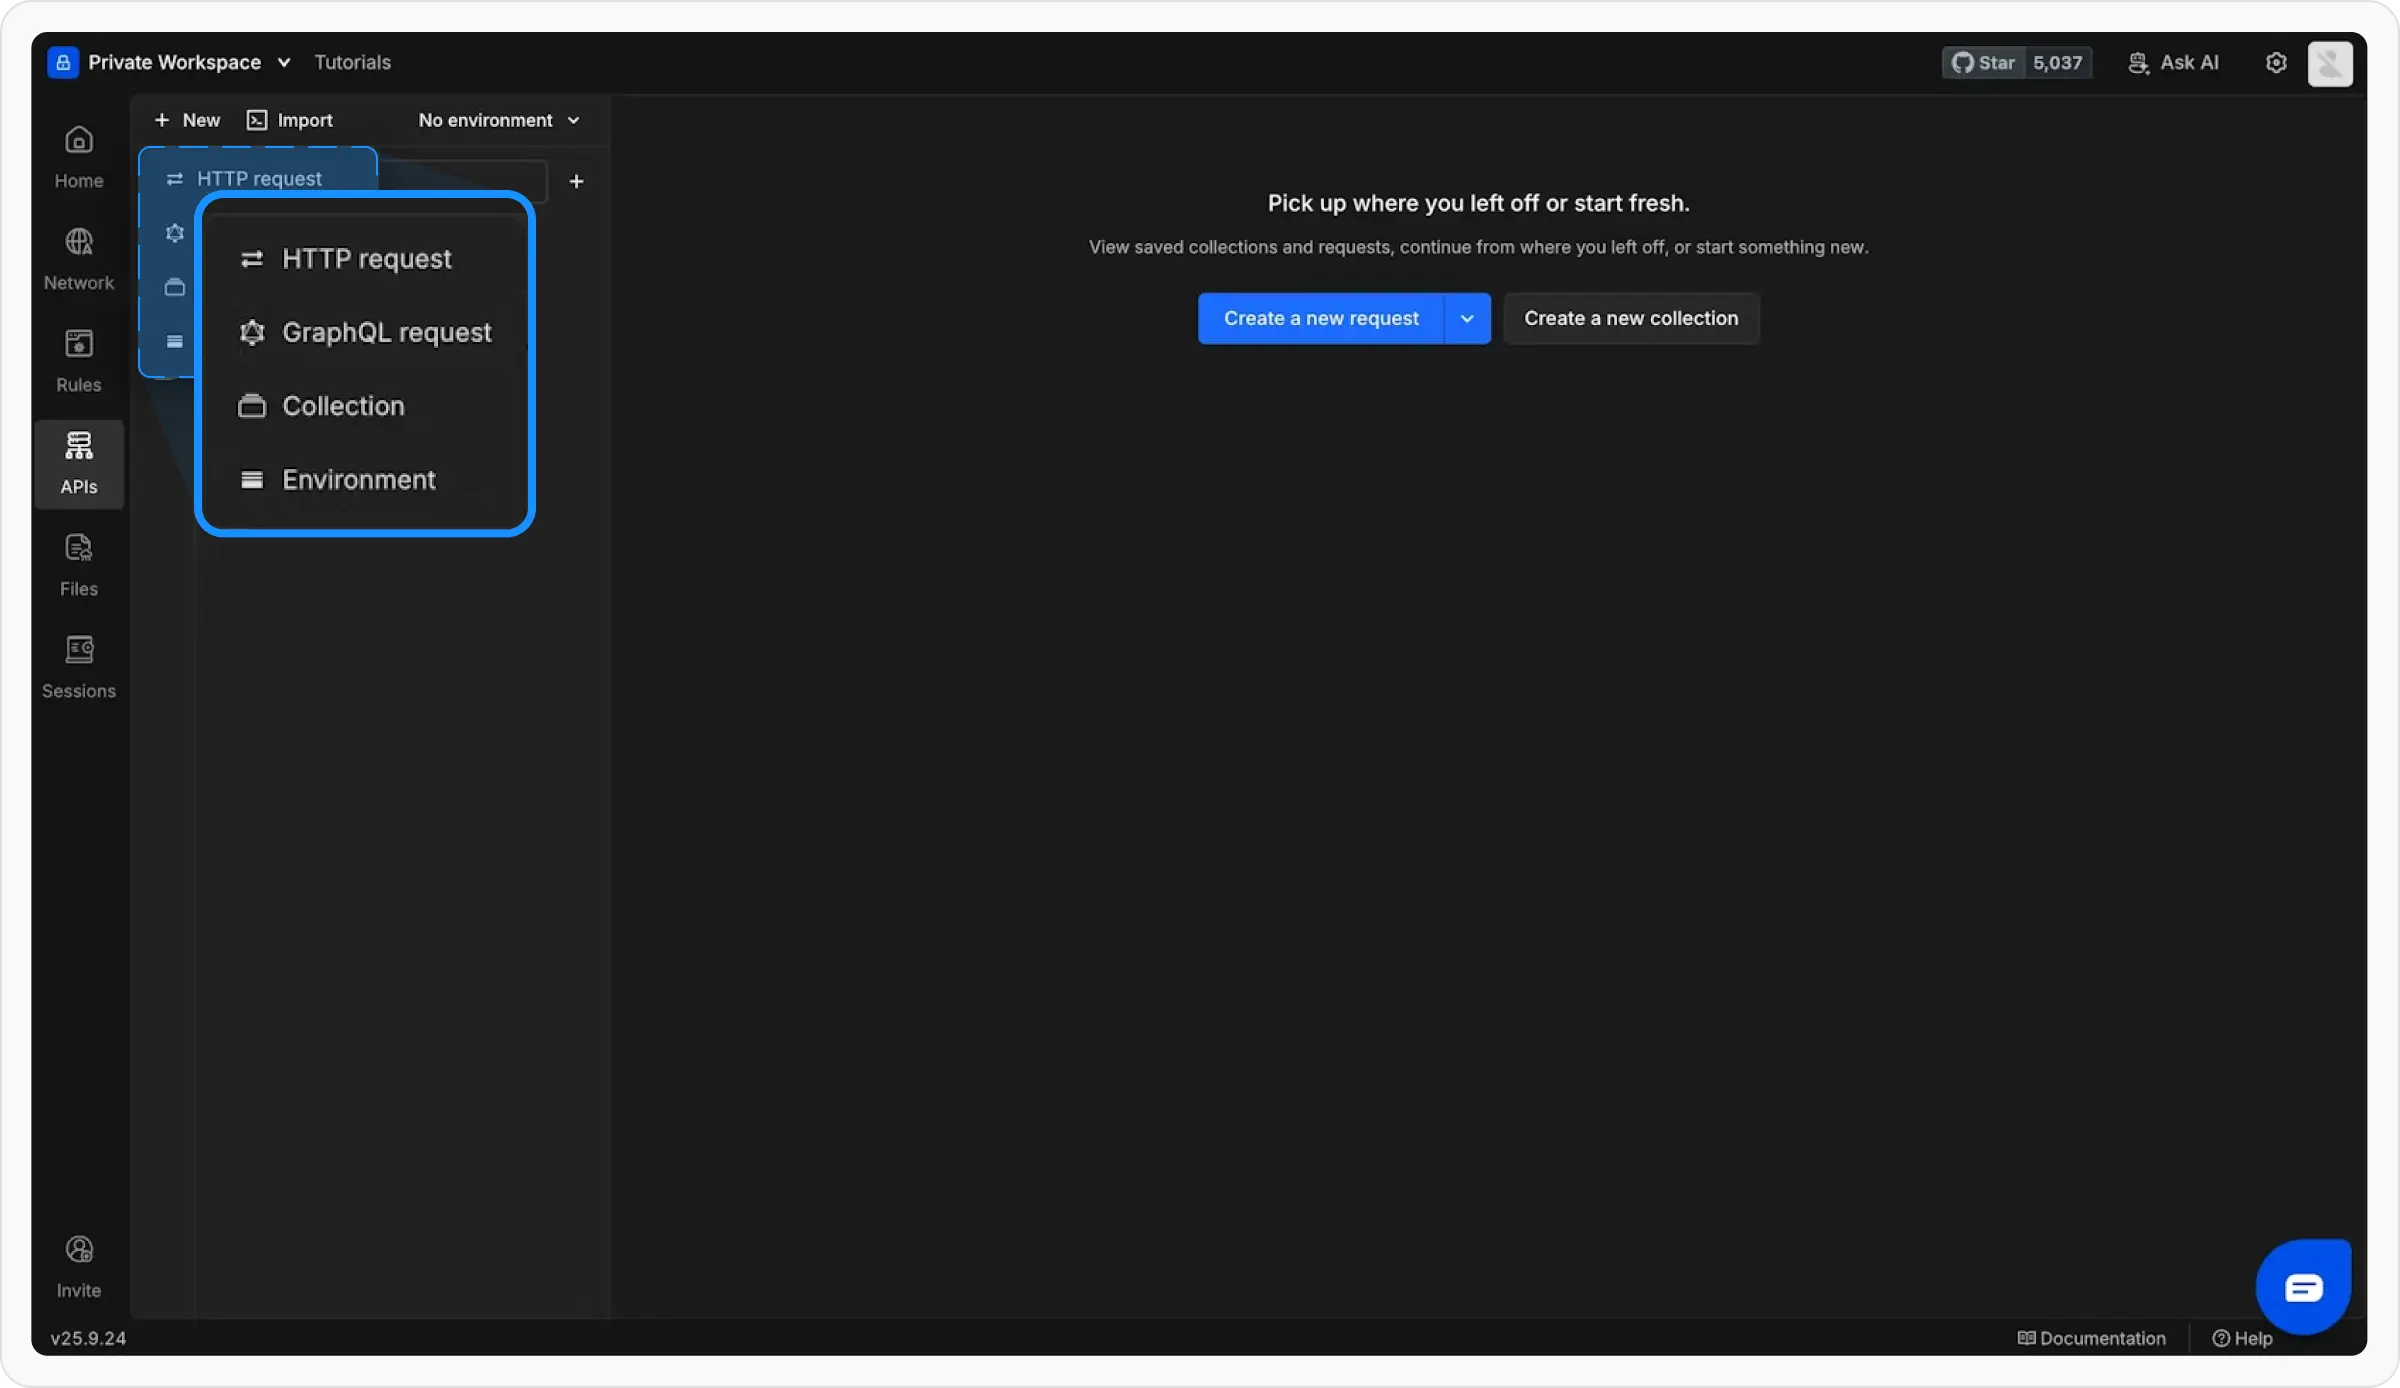

Use Variables in Requests
Update your request URL to use the variable:Variables are referenced using double curly braces: 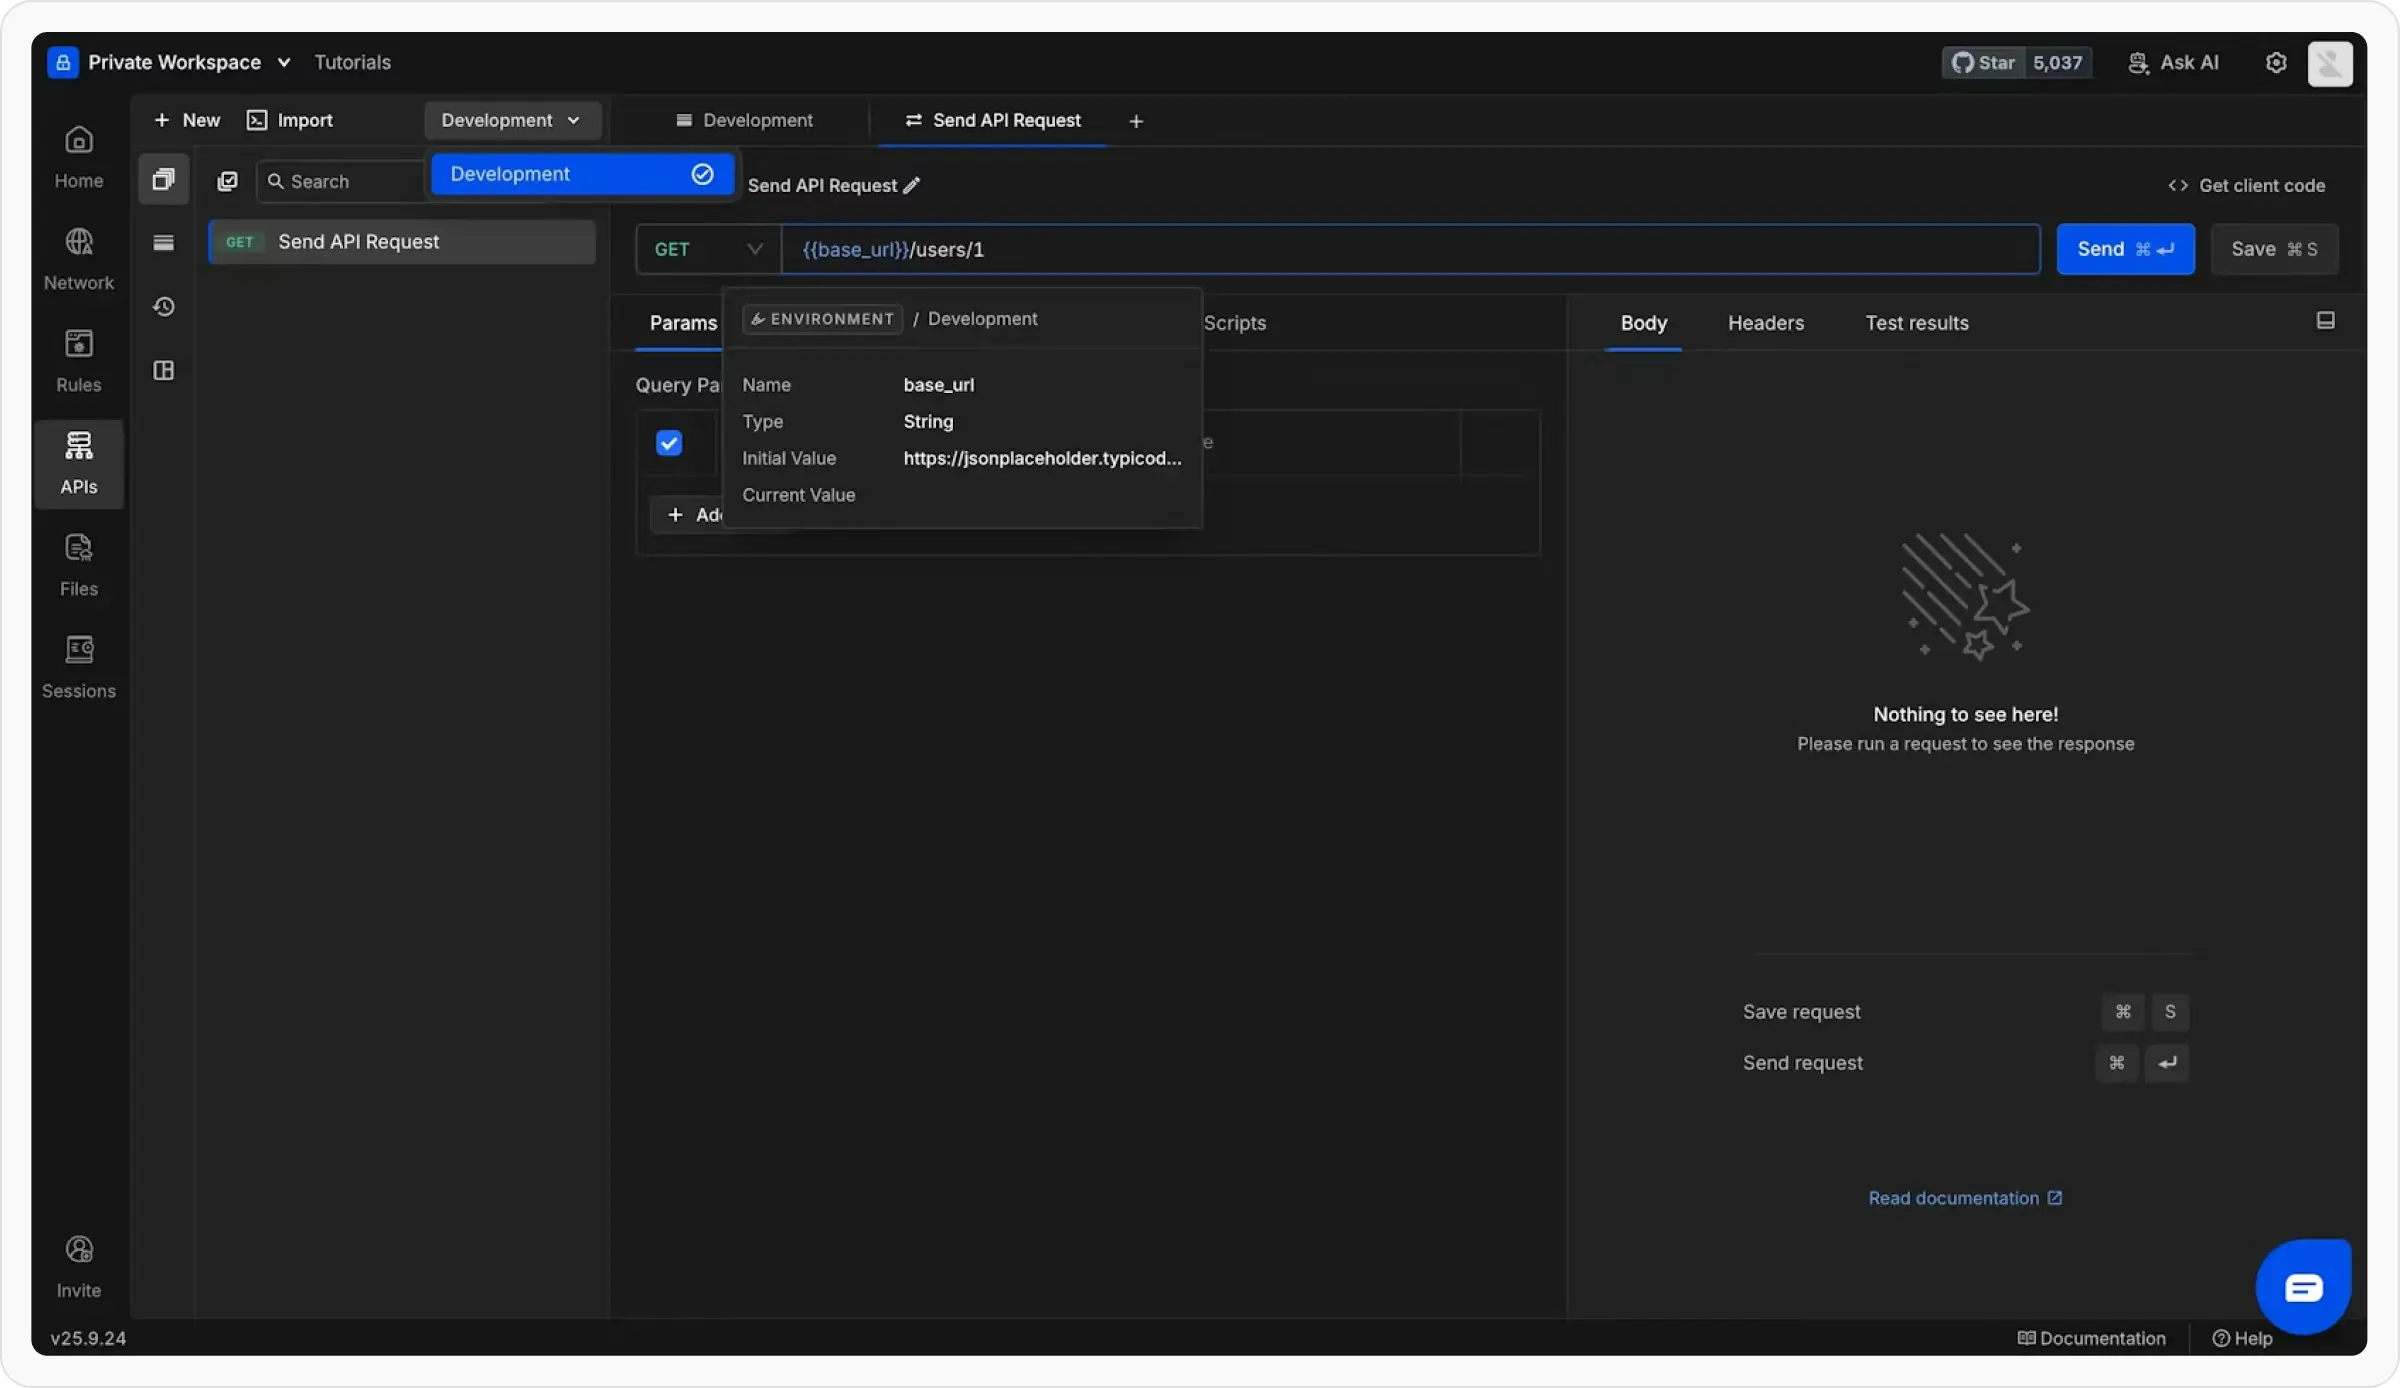
{{variable_name}}Master Variables
Learn about different variable types: Global, Environment, Collection, and Runtime variables
Step 5: Try Advanced Features
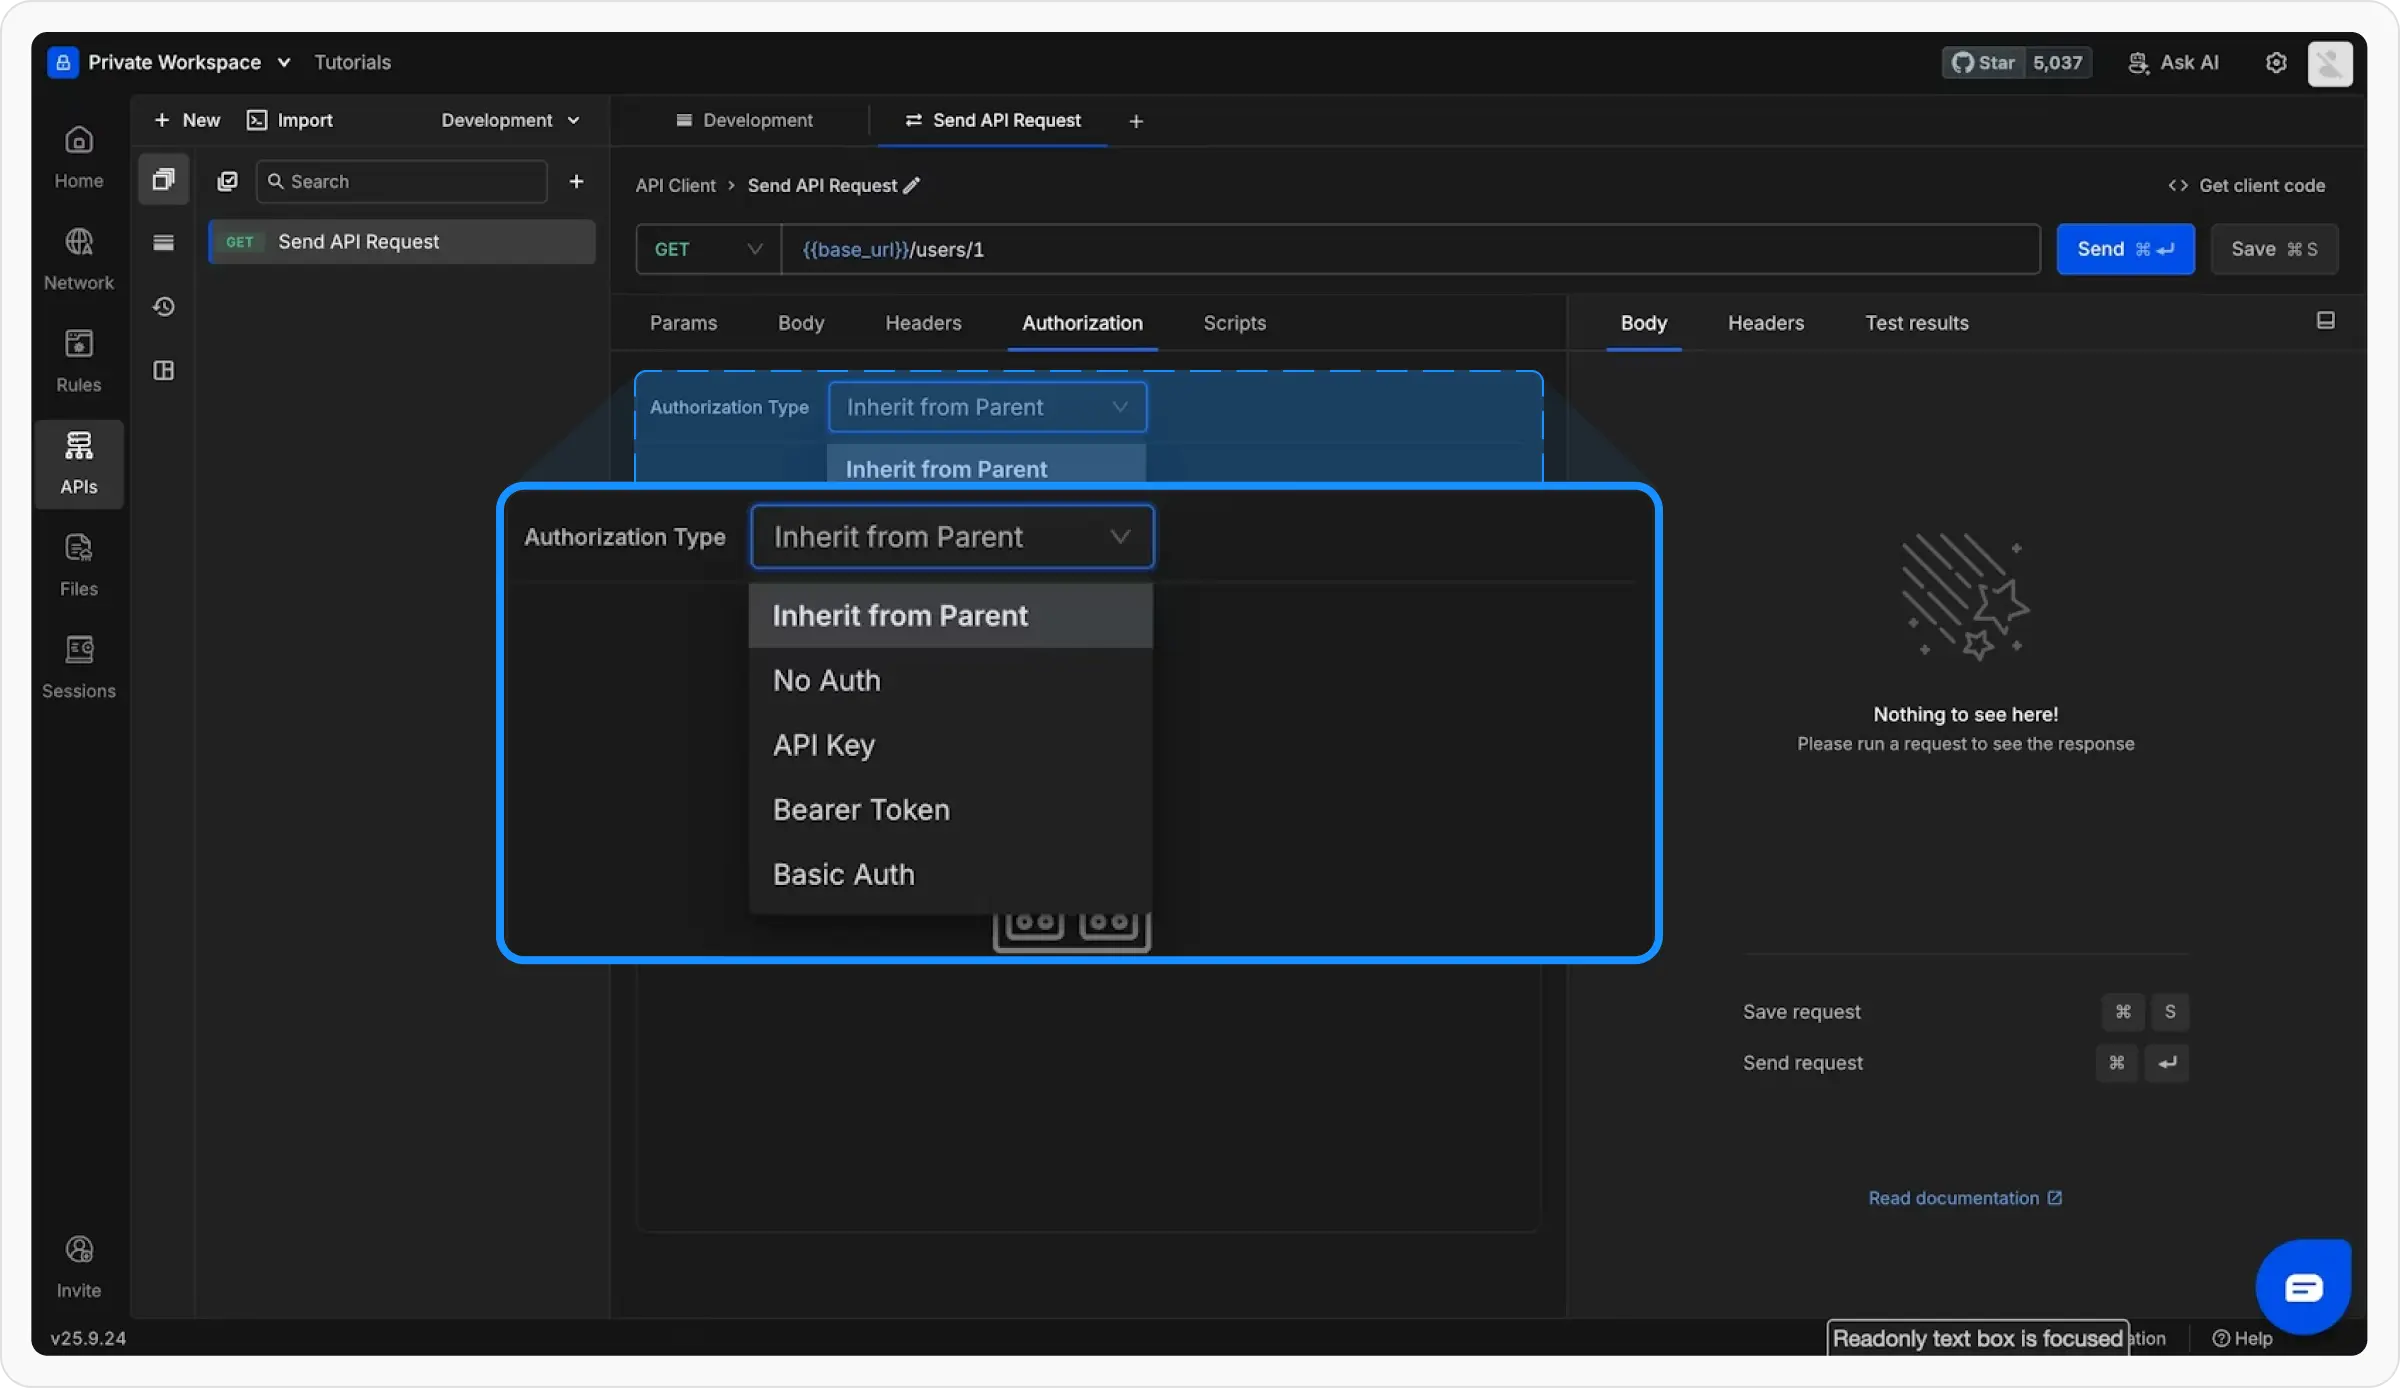
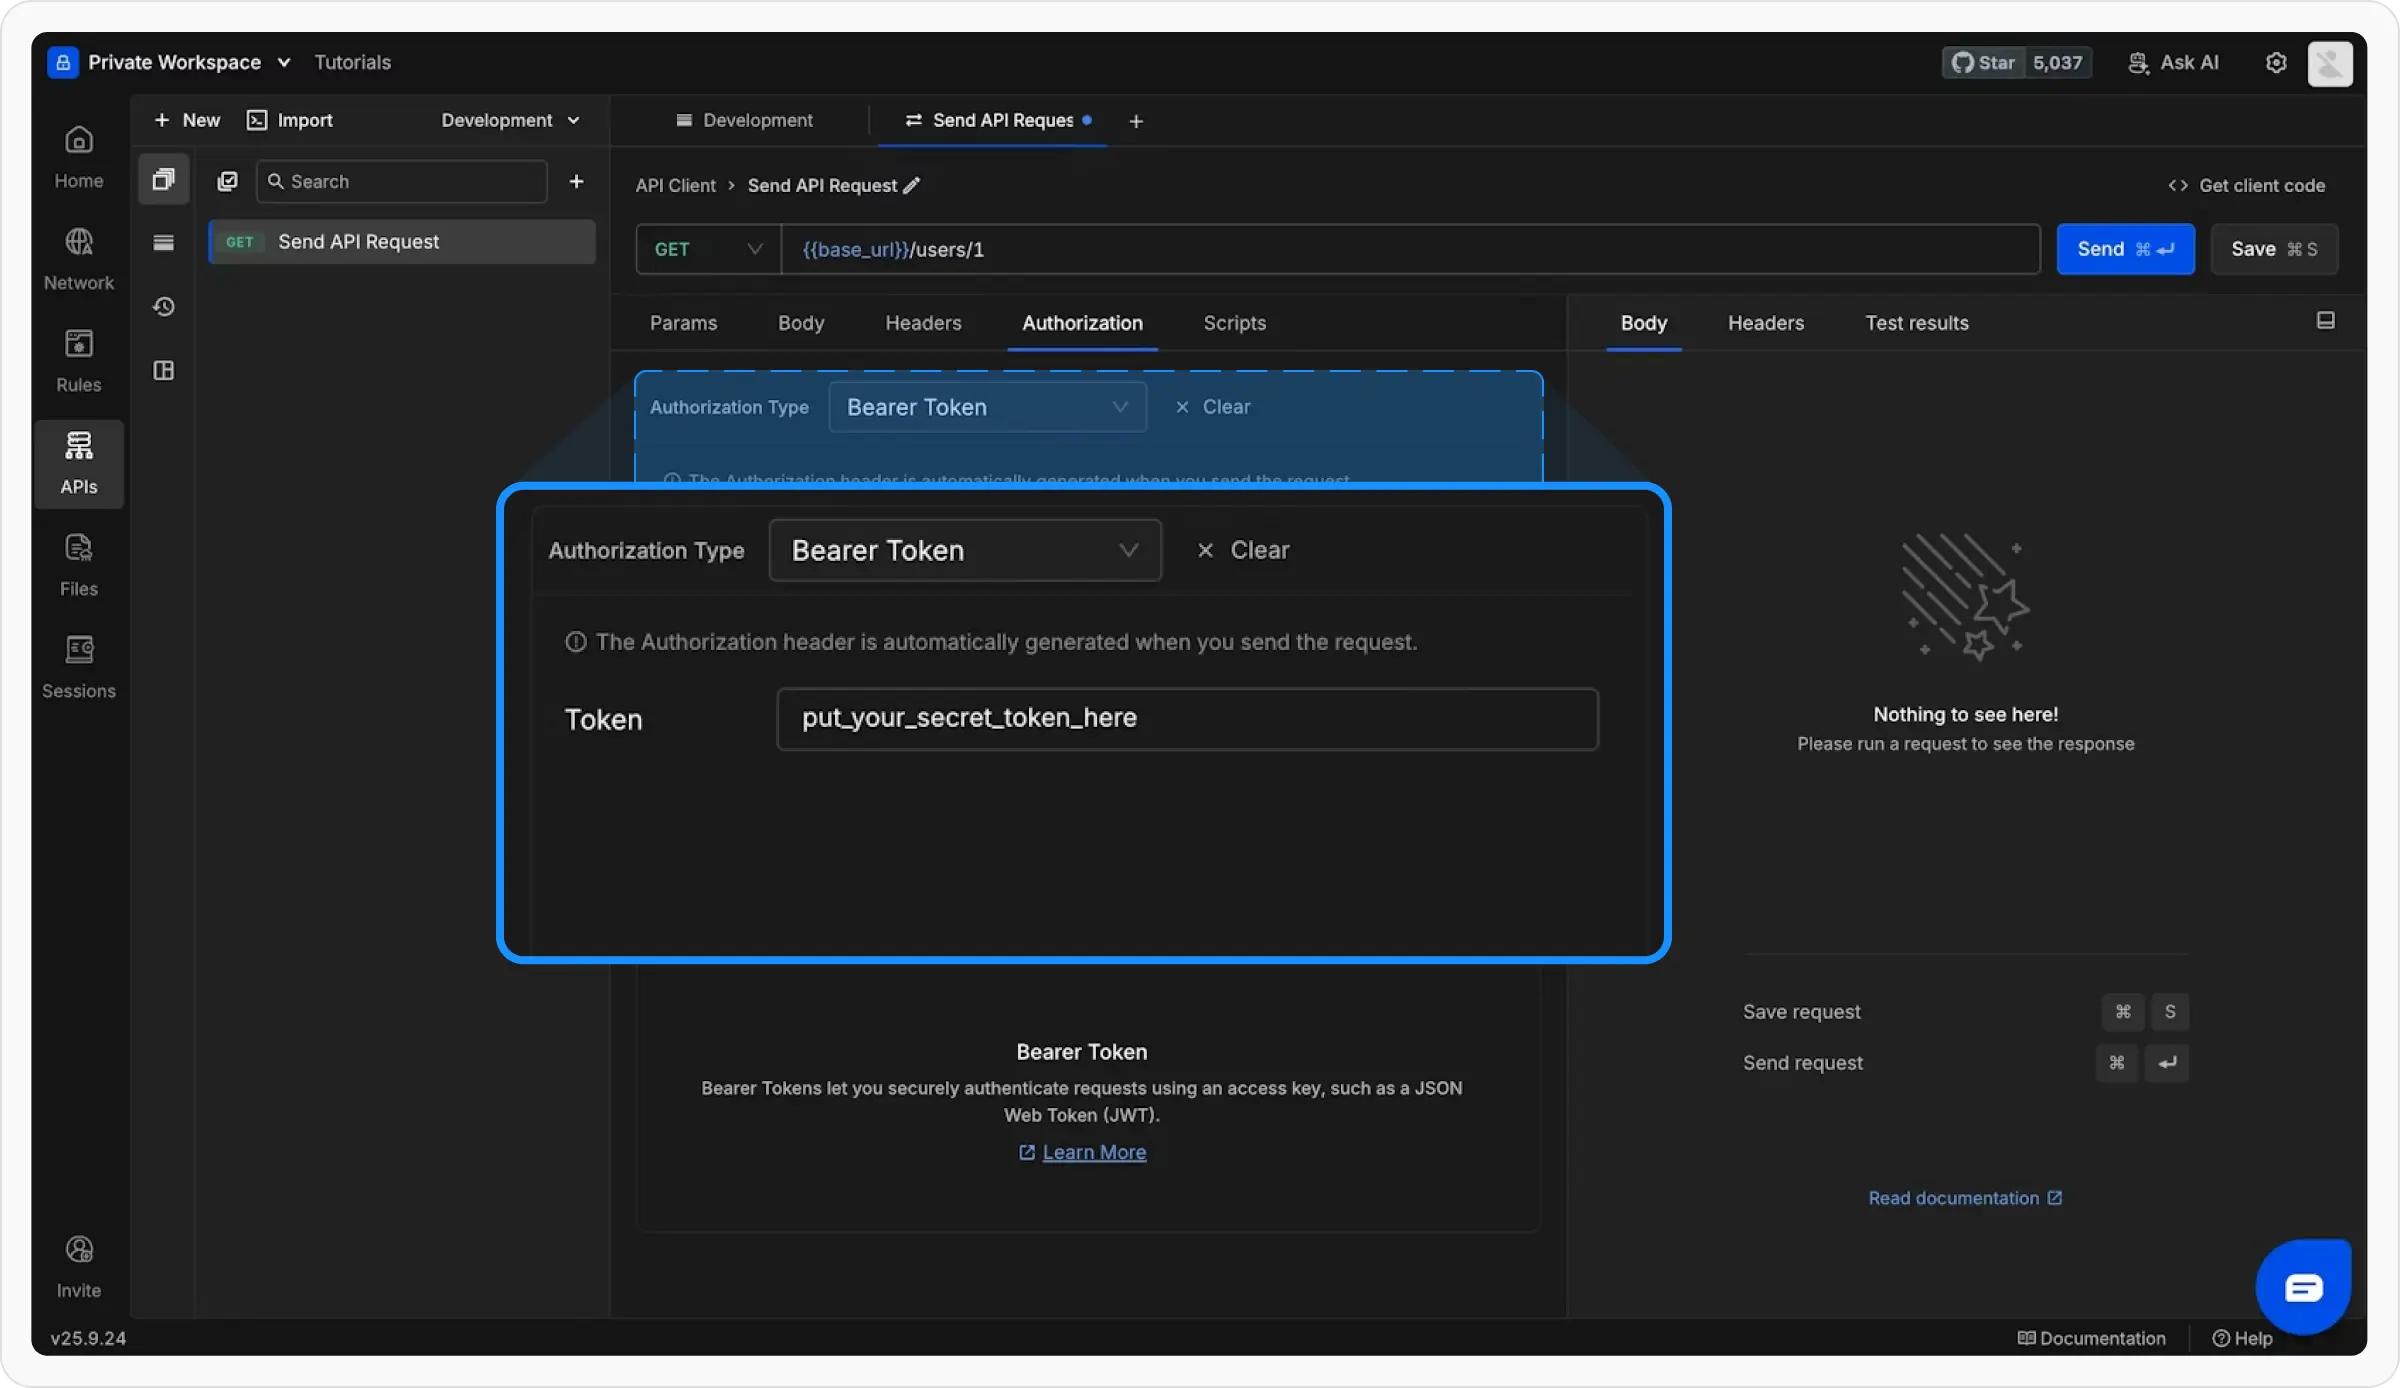
Now that you know the basics, explore these powerful features:Add Authorization
Protect your APIs with built-in auth support:
Full Authorization Guide →
Write Scripts
Automate your workflow with JavaScript:Add Tests
Validate API responses automatically:Import Existing APIs
Already using another API client? Import your work instantly:From cURL
Paste cURL commands
From Postman
Import Postman collections
OpenAPI/Swagger
Import API specifications
Next Steps
You’re now ready to use Requestly effectively! Here’s what to explore next:API Collections Deep Dive
Master collection organization and management
Variables & Environments
Learn about all variable types and scoping
Pre/Post Scripts
Automate your API testing workflow
Generate Client Code
Export requests as code snippets